Home - Home
5 common mistakes to avoid while using a vacuum cleaner
01

5 common mistakes to avoid while using a vacuum cleaner

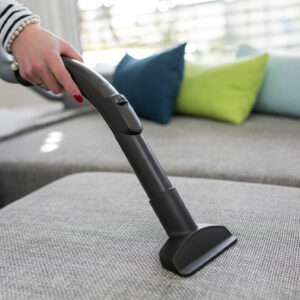
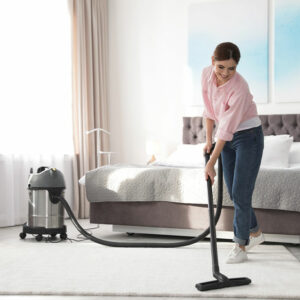
Many people invest a lot of money in vacuum cleaners but do not know how to use them correctly. Vacuum cleaners come with multiple attachments like extension wands, dusting brushes, and crevice tools that facilitate the cleaning of different things. Not using them the right way reduces their cleaning efficiency. They can also malfunction and get damaged. Keeping this in mind, we have listed five mistakes to avoid when using vacuum cleaners: Not emptying the dust bag on time A vacuum cleaner collects dust, dirt, and other fine particles in a duct bag. Operating while the bag is full can cause its performance to drop significantly. The device will not be able to gather more dust and dirt. Further, it will interfere with and restrict the airflow, causing the motor to overheat. If this happens frequently, the life span of the appliance gets reduced. Hence, it is crucial to empty the dust bag on time. If you find opening the bag frequently cumbersome, consider purchasing a vacuum cleaner with a larger dust bag. Most come with replaceable ones; for others, you may have to empty the dirt into the bin and rinse the bag with warm water. A few smart vacuums in the market have an intelligent indicator that sends an alert when the dust bag has reached or is about to reach its capacity and requires emptying. However, these are usually expensive. Trying to clean everything This is one of the most common mistakes that cause severe damage to vacuum cleaners. Many people try to vacuum just about everything around the house without first reading the user manual, which generally lists the things that can and cannot be vacuumed. Most vacuum cleaners are designed to pick up everyday dust and dirt. But if you run it over hard and large objects that lie on the floor, such as a penny, a small piece of stone, or a screw, it can severely damage or even break the appliance.
Read More
Avoid these 10 cleaning mistakes
02

Avoid these 10 cleaning mistakes

Whether you tidy up your home on the weekend or throughout the week, cleaning up is probably an important part of your routine. Maintaining cleanliness not only keeps disease-carrying viruses and bacteria at bay, but a neat environment can also make you feel focused and calm. While you may swear by your go-to tricks, it might be time to revisit them as some cleanup techniques and tools could be making your home dirtier. Using rags and sponges Cleaning cloth and sponges accumulate harmful bacteria over time with repeated use. While it is a sustainable and environment-friendly idea to reuse rags instead of using fresh paper towels all the time, the cloth should itself be clean. Sponges are notorious for transferring germs as well. Although you may use disinfecting sprays before you wipe, the grime and germs from old, overused sponges or rags can get onto these surfaces. To fix this, maintain a separate microfiber cloth for each room and toss them in the washing machine after every use. Spraying cleaner directly onto surfaces Another common mistake is spraying cleaning solution or disinfectant spray directly onto surfaces such as glass, wood, or granite. This will cause a buildup and leave you with streaky and greasy surfaces around the house. Instead, spritz a cloth or paper towel with the disinfecting spray first, and then wipe the surfaces with that cloth. For best results, you can opt for a multi-surface cleaner like Clorox’s Pine-Sol disinfectant, which cleans and deodorizes surfaces without leaving a sticky residue. Using feather dusters These dusters can seem convenient and efficient in reaching hard-to-access corners. Feather dusters are also advertised as tools that can trap dust, however, they simply transfer the dust from one surface to another or suspend the particles in the air or on the floor. Instead, you can use a paper towel or microfiber cloth along with a disinfecting spray to avoid leaving dust particles everywhere.
Read More
7 most common vacuuming mistakes to avoid
03

7 most common vacuuming mistakes to avoid

A vacuum cleaner is designed to clean everyday dirt and dust without consuming too much time and energy. The machine makes the house cleaning process smooth and easy. However, not using a vacuum properly can hamper its capacity to perform and clean effectively. Careless usage can also damage the appliance and cause it to malfunction. Keeping this in mind, we have listed the most common mistakes to avoid while vacuuming the home: Not emptying the bag regularly You may buy a vacuum cleaner that has a massive dust bin to store the vacuumed garbage. But this does mean you should allow the dirt to accumulate until the bag has reached its capacity. It is one of the primary mistakes people make when using vacuum cleaners. According to experts, you must clean or change the bag when it is almost two-thirds full. If you operate the machine when the bag is filled to its maximum capacity, the appliance could get clogged with dust and debris. This reduces the longevity of the device and decreases its efficiency. Also, the airflow within the electronic appliance gets affected, resulting in the motor overheating. Not dusting first To keep vacuum cleaners operating efficiently and ensure your home is spotless, you must dust before vacuuming. When dusting, some of the dust inevitably gets knocked into the air and eventually settles on the floor, which is then picked up by the machine. Dusting the surface before vacuuming also has other advantages. For instance, it can remove tiny objects like a coin, screw, or a small toy out of the way. These items can damage the appliance and cause it to stop working. Further, dusting before vacuuming can eliminate water or other liquids that can cause electrocution and severely damage the device. Not using the correct attachments Vacuum cleaners come with several attachments, such as crevice tools, dusting brushes, extension wands, etc.
Read More
Top air purifiers you can find in the country
04

Top air purifiers you can find in the country

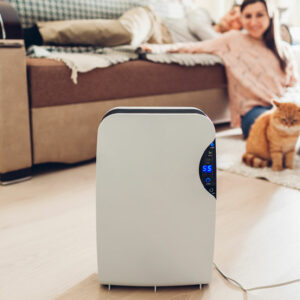
The air around us gets contaminated due to many reasons. Whether you are spending time indoors or outdoors, air pollution is a huge concern, especially considering vehicular emissions, the use of fireworks, and other factors. An air purifier always comes in handy when you wish to eliminate pollen, dust, smoke, allergens, or gases from your home’s indoor air. For filtering out pollutants and improving air quality, here is a list of the best air purifiers: Top 8 air purifiers to consider Coway Airmega 200M The Coway Airmega 200M is a purifier with a decent finish, which helps in cleaning up small and large rooms up to 361 square feet. This non-noisy filter system comes with a True HEPA filter, deodorizing carbon filter, pre-filter, and bipolar ionizer. The device automatically turns into energy-saving mode by turning off the machine when no pollution is detected. The design is simple and compact; the grill and the exterior comes in a square shape, making it ideal for fixing or placing in the corner of a room. The filter has five air control stages: Auto, 1, 2, 3, and Eco. Coway AP-1512HH Another efficient and inexpensive product from Coway, this product can be one of the best performing air purifiers for bedrooms and living rooms. This economical and durable air purifier has a quiet operation, and the timer feature enables the device to run for one, four, or eight hours before automatically powering off. Room coverage is 361 square feet. The HEPA filters can last up to 12 months and can filter out 99.9%² of viruses, bacteria, fungi, and pollen particles. It also includes an antimicrobial treatment to deactivate the spread of contaminants. If no pollution is detected for half an hour, the fan automatically stops and sets to Eco mode to save energy. Levoit Core 400S The Core 400S model from Levoit has an interesting feature.
Read More
7 popular vacuum cleaners to check out
05

7 popular vacuum cleaners to check out

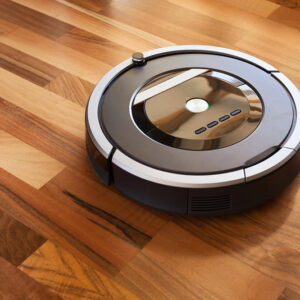
If you’re short on time, a high-quality vacuum cleaner can assist in keeping your home clean and free of dust particles and bacteria. You must invest in a machine that is both robust and adaptable if you want to keep up a regular and constant vacuuming schedule. We have compiled a list of the best vacuum cleaners, including robots, cordless sticks, and long-lasting canisters that would be suitable for almost all homes. Miele Complete C3 Marin Canister Vacuum Cleaner Consumer Reports recommends the Miele Complete C3 Marin as the finest bagged canister vacuum cleaner. It can be used on carpet or bare floors and comes with various attachments, such as a dusting brush, upholstery tool, and crevice nozzle. The maker also claims that it has a stainless-steel wand that can extend up to 36 feet and the Parquet Twister, which can rotate 180 degrees. There’s no denying that the Miele Complete C3 Marin is pricey and has the additional expense of vacuum bags. However, its potential to trap 99.9 percent of lung-damaging particles is not to be dismissed. Without adequate ventilation, it may be a genuine concern; therefore, having a device that dramatically reduces airborne contaminants is vital. Shark Navigator Lift-Away NV352 The Shark Navigator Lift-Away upright vacuum is bagless. Due to its “Lift-Away” design, you can pick up and carry its canister while vacuuming with its wand. It performs admirably on bare floors and cleans various types of waste from low and high-pile carpets. It also cleans pet hair effortlessly, regardless of surface type, and has an allergen-trapping HEPA filter. However, its hefty shape makes it challenging to operate in small areas, and its plastic construction seems fragile in certain spots. Nevertheless, this vacuum cleaner is economical, costing only $179. Tineco Pure One S11 The S11, which costs $350, seems lighter and easier to maneuver than any of its competitors, even during extended cleaning sessions (you can get approximately 30 minutes on a fully charged battery pack).
Read More
5 easy home improvement hacks to try today
06

5 easy home improvement hacks to try today

Home renovation can be a very expensive and time-consuming process. It may involve completely overhauling your home or reorganizing and updating certain sections (like individual rooms, walls, or cabinets). Some find the job so daunting that they keep postponing their plans. However, home improvement doesn’t always need to be a laborious affair. Here are five quick and easy hacks that will instantly elevate your house and give it a fresh feel. Update your cabinet hardware Don’t have the time or budget for full-scale home improvement? Just update the hardware (knobs and pulls) of your cabinets and drawers to change the appearance of your kitchen or any room instantly! But ensure to measure your existing knobs and choose new ones of similar dimensions, so you don’t have to drill new holes. This is a budget-friendly home improvement hack, as knobs and handles generally don’t cost too much. Get an area rug to refresh your living space An area rug can completely change the look and feel of your living space. Even if you have wall-to-wall carpeting in your home, placing an area rug over it can add a splash of color and give it a new appearance. It’s also a great way to cover up spills or mishaps on the old carpet and add dimension to the room. Further, picking rugs that match the room’s overall theme can make the room appear more put-together. Swap out old faucets Save money on full-room renovations by swapping out kitchen and bathroom faucets. Faucets tend to gather debris over time and can look scratched up or dull, even if the rest of the room doesn’t. Swapping them out for new ones will not only lease a fresh breath of life into the room but also save water since new faucets are more eco-friendly. Upgrade the switch plate covers Old plastic switch plate covers don’t add to the room’s aesthetics.
Read More
Top 5 climate control appliances for a smart home
07

Top 5 climate control appliances for a smart home

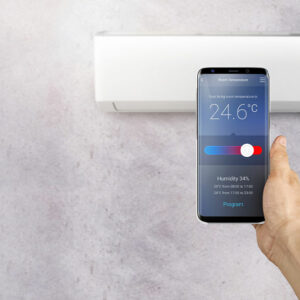
Smart home appliances have been gaining more and more attention over the last few years. These automated systems greatly help regulate the climate and temperature indoors without having to manually make the changes every single time. Smart home devices like voice-controlled appliances, home speakers, and climate control appliances also help simplify tasks while saving on energy consumption. You can connect all these devices to the Wi-Fi and give them instructions without leaving your cozy corner. Smart home thermostat Selecting the right appliances for your smart home’s climate control will slowly help the system learn your preferences and lead the appliances to adapt accordingly. Adding a smart home thermostat to your climate control system ensures automation of the other devices and can communicate with them. Smart home thermostats enable you to control power consumption when you are not home, automate the system, and set fixed temperatures and settings for specific times and zones. And if you have ducted ACs, your thermostat will help with it as well. Smart windows Fitting your home with smart windows is another way of adding assistance to your smart climate control system. These fittings are especially appreciated in high-to-reach areas or for clerestory windows. Automated windows can easily help warm the air inside the home to escape. Opening these windows can assist in establishing an equilibrium in the air inside and outside the home. Smart windows also come with sensors that allow the windows to close automatically in case of rain or even strong wind. This means smart windows can effectively help control indoor temperature and daytime light exposure. Smart air conditioner Getting a smart air conditioner is an excellent alternative if you do not have access to a ducted central air conditioning system or do not want one. You can have different smart air conditioner units in all the rooms in the house that may need to be cooled during the hotter months of the year.
Read More
9 Common Cleaning Mistakes to Steer Clear of
08

9 Common Cleaning Mistakes to Steer Clear of

Clean houses are more inviting and warmer, which also boosts productivity. Routine house cleaning, on the other hand, can be time-consuming. Furthermore, some cleaning methods may be more harmful than beneficial. Furthermore, leaving bacteria, dust, and filth behind adds to the overall workload. Cleaning with a set routine and timetable and a few tricks and hacks saves time and effort. Here are some common cleaning mistakes to avoid keeping your home clean and fresh. Common cleaning mistakes to avoid Using dirty cleaning tools The cleaning procedure will only be effective if the supplies are in good shape. Ensure your cleaning supplies are in good condition before spreading bacteria, filth, and dust throughout the house. Wash mop heads, scrub brushes, and clean cloths regularly, and sterilize germ-prone equipment like toilet brushes after each use. For the best results, empty your vacuum when it becomes full and change or wash the filter regularly. Cleaning solutions like Clorox pine-sol cleansers are ideal for hard, nonporous surfaces such as floors, sinks, worktops, stoves, bathtubs, and shower stalls. Rubbing stains instead of blotting Spills and splatters often require immediate action to avoid setting-in stains, but scrubbing worsens the situation. When rubbed, a stain may spread, penetrate the fabric more deeply, or even harm the upholstery’s fibers. Always remove any remaining substance after blotting stains with a clean, white cloth using the stain-cleaning method and products. Not cleaning before disinfecting Cleaning and disinfecting are two different processes. While disinfecting uses chemicals to kill bacteria, cleaning physically removes germs from a surface. Cleaning is an essential first step because the disinfectant will only effectively target the bacteria if the surface is free of dust or debris. Before using the disinfecting spray, ensure the surface is free of debris and residue so the chemicals can work. Use pine disinfectant after cleaning to thoroughly clean and remove dirt, odors, and germs from various surfaces.
Read More
6 Easy Home Improvement Hacks to Check Out
09

6 Easy Home Improvement Hacks to Check Out

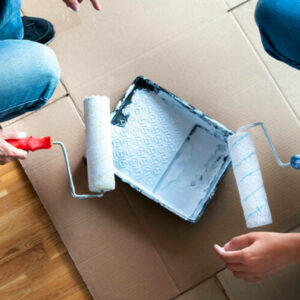
From time to time, you must pay for certain repairs and maintenance to preserve the look and aesthetic of your home. And this is the perfect opportunity also to consider upgrading old appliances, redoing the floors or ceilings, or recoloring walls and furniture accents. Subtle changes and touch-ups are done on a budget can transform living spaces. To give you more insights, here are six ideas for home improvement to check out. Front door and yard makeover What’s the first thing your guests encounter walking towards your home – the front yard and main door? Experts suggest repainting the main door with a bright, welcoming color that looks much better than dull and drab white. The right color can undoubtedly transform the look and aesthetic. Add a landscaping touch to trim the hedges and place some bloomed potted plants. Even installing outdoor lighting to illuminate the pathway is a simple home improvement clean-up hack that can be done on a tight budget. Upgrade your kitchen essentials Is everything accessible or up to date to make cooking seem less of a chore? If not, then you can consider a few simple hacks. Instead of upgrading the entire cabinet section, have the knobs replaced to make the cabinet more accessible. You’ll be surprised how big a difference this upgrade makes. Consider changing the existing lighting fixtures and upgrading the wattage to make the space look well-lit and pleasing. Also, pay attention to some of the appliances as better energy star-certified alternatives are available. You can save money on electricity and promote a more environment-friendly kitchen by reducing your carbon footprint. Even upgrading the plumbing systems to install a new faucet can save water. These minor upgrades and energy-efficient home improvements can transform your kitchen into a functional setting before you host your next big family dinner.
Read More
20 common home lighting mistakes to avoid
10

20 common home lighting mistakes to avoid

Lighting is a vital element in interior design, elevating the ambiance and functionality of living spaces. Yet, common lighting blunders can mar even the most carefully crafted interiors, and it is absolutely crucial to steer clear of these 20 frequently-made home lighting mistakes. Avoiding these will help to create a space that seamlessly combines practicality and visual appeal and is easy to adapt with changing needs. Neglecting Layered Lighting Relying solely on overhead lighting can lead to harsh shadows and an uninspiring atmosphere. Embrace layered lighting by integrating ambient, task, and accent lighting to achieve a balanced and versatile illumination. Selecting the Wrong Color Temperature The color temperature of lighting can profoundly impact the mood and aesthetics of a room. Avoid the pitfall of mismatched lighting by choosing bulbs with suitable color temperatures. Warm white (2700k-3000K) creates a cozy atmosphere, while cool white (3500-4100K) suits task-oriented areas. Omitting Dimmer Switches Failure to install dimmer switches limits the control over lighting intensity. Dimmers enable the better adjustment of brightness for various activities, fostering ambiance while conserving energy. Ignoring Energy Efficiency Overlooking energy-efficient lighting options like LED bulbs can result in higher utility bills and frequent replacements. LEDs are not only long-lasting but also consume significantly less energy compared to traditional incandescent bulbs. Disregarding Natural Light Natural light is a valuable asset, providing a sense of well-being and reducing the reliance on artificial lighting during the day. Avoid blocking windows with heavy drapes or furniture to harness available sunlight. Insufficient Task Lighting Task-oriented areas, such as kitchens or workspaces, necessitate ample task lighting to ensure safety and productivity. Overhead lighting alone may cast shadows, hindering specific tasks. Neglecting Fixture Size The size of lighting fixtures should harmonize with the room’s proportions. Oversized fixtures can overwhelm smaller spaces, while diminutive fixtures may get lost in larger rooms.
Read More

Latest Articles